


Follow these steps to successfully configure your Netvio JP4 & JP4-60 Series AVoIP installation.Netvio recommends the use of Netvio 360 for configuration due to the auto-discovery and online firmware update functionality built into the software.
You can download the Netvio360 software, using the button below. After completing basic licensing information, you will receive an automated email providing instructions for the software download.
Please ensure you check spam email folders.
Getting Started
-
If using 3rd party switches, ensure that they are fully configured before connecting Netvio TX encoders and RX decoders to prevent broadcast storms hampering discovery and communication.
-
Once configured, connect all units to your AVoIP switch. Connect the AV LAN port of the CL to your AVoIP switch and the CTL LAN port to the main network.
-
If using a Netvio IP-SW series switch connect all devices ensuring correct connectivity of the CL and LAN ports.
-
Both the web UI method and Netvio 360 software configuration connect to the CTL LAN port of the controller that is set to take a DHCP (with link local failover) IP address by default.
-
You do not need to connect directly to the TX & RX at any time as all config is handled by the CL controller.

Discovering CL Device
-
If using the web UI use a IP scanning tool to discover the CL’s IP address. All Netvio MAC addresses start with 1C:AE to help you identify the correct unit.
-
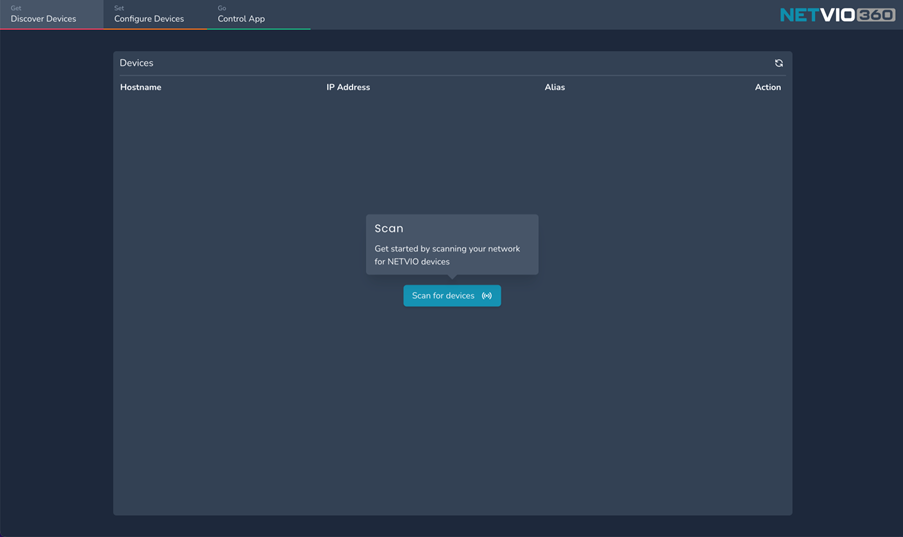
If using Netvio 360, open the software and press the scan for devices button in the centre of the screen.
-
Any available Netvio controllers will be listed, and a firmware check will be performed, enabling a single click update to the latest firmware if required.
-
When Ready press ‘Configure’ to enter the CL web configuration interface and login using the default username and password: admin & password
Discovering Encoders & Decoders
-
Press ‘Scan and Assign’ to automatically discover and assign the TX & RX’s to Input & Output endpoint numbers.
-
You can reorder the endpoints using the up & down arrows, by dragging the dotted button or by typing over the endpoint number with a new number. Allow a moment for the endpoint to sync after each change.
-
Settings are stored in the endpoint so you can unassign a unit and reassign a different one, making replacing units a breeze.
-
To assign a name to each device click the model number in each endpoint and type a more suitable name and press 'Assign’ or enter.

Configuring Input End-Points
-
To configure Input and Output endpoint settings, click the white check box to the right on the endpoint, you will see that the bottom menu will highlight settings that are relevant to the type of device. You can select multiple endpoints or all by using the check box to the right of the Input title at the top.
-
Click an item in the bottom menu to open the settings window where you can configure Video, Audio, RS-232, Network & EDID settings.
-
The ContentPlus+ preview stream settings are available in the video and network settings tabs.
-
There are also IR, Serial and CEC command test pages where you can experiment with commands to endpoint outputs.

Configuring Output End-Points
-
Follow the same process for Output endpoints by checking one, many or all endpoints and using the bottom menu to open Video, Audio, Serial & Command settings.
-
HDCP management & Scaler settings are found in the video settings to enable compatibility with older displays or devices with limited HDCP capabilities.
-
The Commands Settings tab is where you can configure IR, Serial or CEC display control for automatic power off & on when sources power on & off and for use with Netvio Go display power control.
-
Endpoint firmware updates can also be initiated from the bottom menu if available.

Configuring Controller (CL)
-
Across the top of the page you will see Controller Options, Controller Management & Auth & API Settings.
-
Controller Options contains the Network settings for the controller CTL LAN port.
-
Controller management contains reset functions and manual firmware updates.
-
Auth & API Settings contains password and network security settings.

System Status & Feedback
-
Use the Expand Endpoint button (down arrow to the right of the check box) to view the status and current settings of each endpoint.
-
By enabling the Infrared, Audio, Serial & USB signal filters in the top right of the page you can see more datapoints for each of signals.
-
Clicking the camera button will take snapshot of the video signal from a device and pressing it again will keep refreshing the image every 2 seconds to help ittentify the unit by its content.
-
Clicking the Preview URL will copy it to the clipboard so that it can be pasted into your chosen hardware or software solution.

Testing & Signal Routing
-
Use the Target pickers to route signals from Inputs to Outputs. Clicking a target will highlight possible routing points in white for you to select.
-
The main target pickers, next to the Endpoint numbers, will route all signals (except ARC on JP4-60)
-
By expanding the endpoint and enabling each of the signal filters, you can independently route Video, Audio, IR, RS-232, USB & ARC signals.
-
ARC routing is set once and cannot be changed from API.

System Status & Feedback
-
Use the Expand Endpoint button (down arrow to the right of the check box) to view the status and current settings of each endpoint.
-
By enabling the Infrared, Audio, Serial & USB signal filters in the top right of the page you can see more datapoints for each of signals.
-
Clicking the camera button will take snapshot of the video signal from a device and pressing it again will keep refreshing the image every 2 seconds to help ittentify the unit by its content.
-
Clicking the Preview URL will copy it to the clipboard so that it can be pasted into your chosen hardware or software solution.

